
Forgive the dorky garnish, I get a bit carried away sometimes...
I broke down and bought an ice cream maker earlier this week. I’d been pondering it for quite a while, keeping an eye on CraigsList and finally just bought it. As soon as I got it home I rushed the bowl into the freezer so it would be frozen and ready for some churning once I figured out what I was going to make. We have a good deal of lemon balm around this place that I am always trying to figure out a use for and earlier in the week I had set my mind to make a recipe I came across on The Accidental Hedonist. But the sun decided to come out and play today after almost a week of cooler weather, and suddenly a super rich custard based ice cream didn’t seem so appealing. I am saving that recipe though and will most likely make it my next project.
Instead I fished around in the freezer, knowing that we still had some reserves of fruit frozen from last year. I took a gallon bag of blackberries we picked last September out and started doing research on basic proportions for a sorbet. I found this recipe from Cafe Lynnylu and got to cooking. Once I had boiled down the fruit in syrup I gave it a taste, waaaaay too sweet for my tastes. Then I remembered I had about a half quart of buttermilk languishing in the fridge. I added about two cups of buttermilk to the already prepared recipe and away we went.
Blackberry Buttermilk Sherbet
Adapted/Inspiration from Cafe Lynnylu
- 1lb fresh of frozen blackberries
- 1 1/4 cup sugar (I might even cut this down further next time)
- 1 cup water
- 2 cups buttermilk
Heat water and stir in sugar until fully dissolved. Add defrosted or fresh blackberries to the sugar mixture and bring to a boil, stirring until the fruit has softened sufficiently. Carefully pour berry-sugar mixture into a blender and puree. Pass through a sieve straining out all of the seeds. Add two cups (give or take) of buttermilk to the strained puree and cool for several hours before placing in ice cream maker.
The original recipe called for 10 lemon verbena leaves, which sounded great – and I actually threw in about 14 leaves to steep in the sugar syrup. But the resulting puree didn’t have even a hint of verbena in it. I suspect the blackberries are so richly berry-flavored already that the verbena leaves were no match for them. I would skip the verbena for this particular recipe and save em for something else where they will really shine through. The addition of the buttermilk gave it a slight tang and also added just a touch of creaminess to the hardcore blackberry flavor. Overall, not bad for a first tryst with a new toy.
Tags: Cooking · Local Food

It is always astonishing to me to witness all of the growth and change within a few short seasons. It happens every year but I am still surprised and giddy when the first passion flower blooms on the vine or the first flower appears on the bean stalks. I was looking back through my pictures and decided I just wanted to document the change and growth we have seen here in just a few months. We put in a new garden bed and extensively expanded our existing bed and now that they are all starting to produce, I thought it fitting to go back to the beginnings of the cold winter and spring months when it was all just a dream, seed packets and piles of dirt
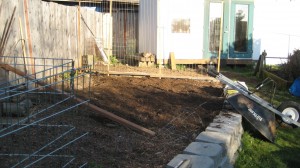
- Main bed in April
Gary dug out a large portion of dead stump and several feet of rock hard clay soil this spring so that we could expand the main bed we put in last year. At this point in April we had erected the bean trellis but the only growing thing toward the back of the bed were the (still hiding) raspberry canes along the fence. Peas, spring onions and beets were in the foremost part of the garden, fenced off by the wire gate you see on the left.
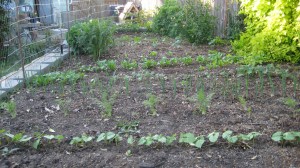
- Main Bed in May
After laying down a yard of compost in the clay I sowed pole beans, bush beans, arugula, kale and swiss chard. I also transplanted starts of fennel, kohlrabi, butter lettuce, leeks, lemon cucumber and summer squash that had been hardened off in the cold frame for a week or so after starting from seed indoors.
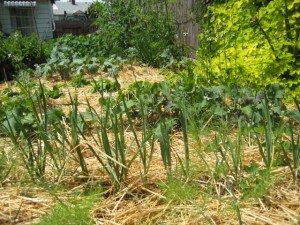
- Main bed in June
It took a good part of June before things really started to take off.
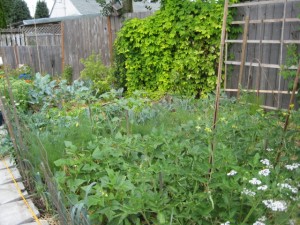
- Main Bed in July
This picture above is as of today. I have already pulled the peas (two varieties – a snow pea and shelling pea) and the first round of beets from the front of the bed. We are eating fennel, kale, lettuce, kohlrabi and spring onions and the bush beans are already setting pods.
In a meager attempt at crop rotation (and in concert with our larger goal of eradicating the lawn) we decided to make a new tomato bed in a largely unused section of turf near the house. Last year’s tomatoes went in the main bed and I am still pulling out volunteers. Gary (ever the digger) tackled yet another 2.5 feet of Skyway clay, making a nice hill for Hux to nap on.

We used broken up concrete pieces from an old walkway to create the raised bed and amended the soil with about a yard and a half of mixed compost and manure from Cedar Grove. The manure did wonderful things to my sickly tomato plants that were suffering from a pretty serious phosphorus deficiency due to the cold spring. I transplanted the starts on the same day we finished shoveling and hauling the compost. The amendments were still putting of a significant amount of heat and it perked the plants up within a day.
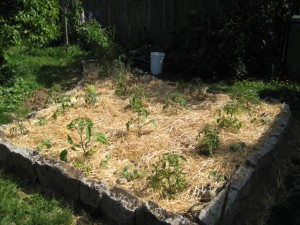
The photo above was taken a month ago today. Notice the self control and wide spacing I afforded each tomato plant. This lasted all of about 4 days before I realized I couldn’t bear to throw away any of the remaining tomato starts I had coddled since March, so I stuck several more plants in. Our neighbor gave us a bunch of Chinese broccoli starts she had to thin out of her garden right about then, so I stuck those between the tomatoes. We practice square foot gardening round here – 6 plants every square foot.
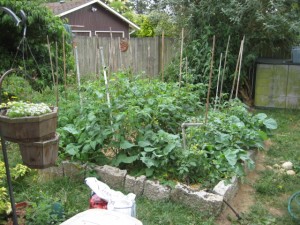
- Tomato Bed July 23rd
And we’ve got tomatoes, nary a red one in sight, yet….

Beaver Lodge Slicer
This year for tomatoes we are growing BeaverLodge Slicers, Super Marzanos, Black Russians, Tiffen Mennonites, a japanese plum variety I forgot the name of already and an Isis Candy. That along with a few volunteers I am allowing to grow from last year. Hopefully one of them will be the amazing Black Krim or a Principe Borghese for drying.
Tags: Gardening
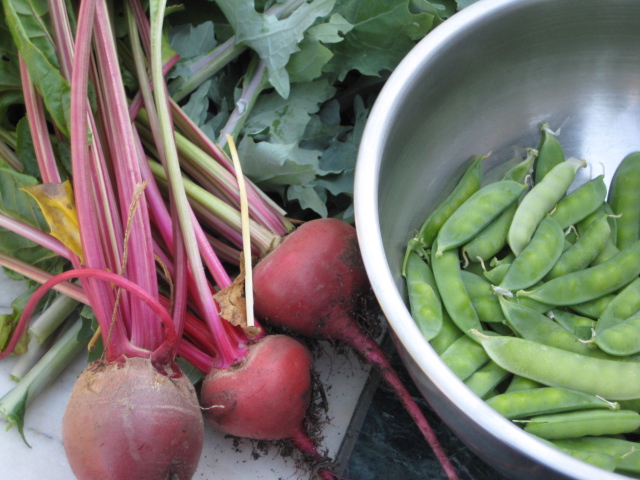
This year I have been trying to record our harvest much more rigorously than in years past. Both to aid in my planning for next year and to get a true idea of what we can get out of our little square of earth. I toyed with the idea of creating a sidebar listing the harvest and then just decided to go ahead and join the Independence Days Challenge as it covers everything I wanted to record and then some. Hopefully, actually joining up will keep me on my toes in terms of being rigorous in recording and perhaps get a bit more done around here each week so I can meet all the categories. Here is my entry for this week.
Plant Something – Planted this week. Marigolds, Sweet William, Rudebeckia, Basil, Dill, Catnip, Shasta Daisy, and Cilantro.
Harvest Something – Kale, Arugula, Beets, Buttercrunch Lettuce, Shelling Peas, Fennel, Basil, bunching onion, spearmint, lambsquarter and oregano.
Preserve Something – 2 gallons Kale, blanched and frozen. 2 pounds Peas, most frozen some currently drying. 2 gallons arugula made into ravioli for freezer. 2 gallon s of Lambs quarter picked and washed waiting for inspiration on preservation, (we’ve got it coming our our ears) any ideas?
Prep Something – Pulled the last of the arugula to prepare row for Broccoli and Cauliflower starts. Pulled out Peas and cleaned bed. Bought a metric buttload of canning jars (used) off Craigslist in preparation for tomato season and pressure canning this fall. Pruned the tomato plants. Managed the aphid infestation on the nasturtiums. Every year it happens and every year I plant em again…stupid? Perhaps, but they’re so purty!
Cook Something – Steak Salad with greens from the garden, Homemade pasta with fresh peas, bacon and onion, Arugula Ravioli with Ricotta and Sun Dried tomato (see previous post), Lemon Balm Queso Fresco (inspiration from Dana at Tasting Menu), Kale, Beet Green and Chard saute with Garlic and a poached egg. Sour Cream Ricotta Peach Tart with burnt Caramel.
Manage your Reserves – Took stock of the freezer (and arranged stock in the freezer). Stripped and packaged the first round of Spearmint, Oregano and Lemon Balm hung up to dry several weeks ago. Remaining from last years harvest (or farmers mkts): 1 delicata squash, 2 quart bags rhubarb, 2 gallon bags blueberries, 1 gallon raspberries, 3 half-pint and one pint jar pickled green tomatoes, 2 half-pints tomatillo salsa, 1 pint green tomato relish, 3 quarts canned whole tomatoes and 1 pint sun dried tomatoes.
Work on Local Food Systems – Bought Dill, Cherries and New Potatos from the Renton Farmers Market. Did further research on another source for grassfed lamb this year. We just got word from last years source that they will not be selling any meat this year. Anyone have a good source for Lamb or pork in Western WA? We prefer to buy straight from the farm, a whole lamb or probably 1/4 pork. Looked (again) for a reasonable source for raw milk – no luck.
Tags: Independence Days
Now comes the time that I waffle on when to plant seeds for the fall garden. So many of our plants are still growing and producing I am loathe to pull em out before their prime. And very little of what is currently ready is preservable (mostly lettuce, fennel, green onions, etc). But I also already have 10 broccoli and cauliflower starts waiting for a home and two other flats of seeds sown. As I mentioned in a previous post, we have been enjoying arugula flowers for weeks now and I finally decided to clear the arugula row to make way for others waiting in the wings.

After pulling the remaining plants I was left with a huge bowl of the last arugula leaves and pondered how to use them. We already have an overabundance of salad greens, with 8 heads of butter lettuce mature and waiting in the garden and two gallon bags of picked and washed lambsquarter waiting in the fridge. Not to mention the kale-gone-wild, beet greens and swiss chard also patiently awaiting consumption.
Some non-salad solution was necessary for the last of the arugula. I also had a good sized container of ricotta in the fridge. Left over from yet another failed batch of mozzarella. My mozzarella making has been a trial lately, the first few batches came out wonderfully but I can’t get the curds to set correctly the last 3-4 times I have made it. This despite confirming that I am not using ultra-pasteurized milk (which I know causes problems) and changing milk brands on each attempt. My last attempt will be to try again using raw milk, but I haven’t found a source for raw milk here that doesn’t charge $10 per gallon. And I am having a hard time legitimizing paying $4 more a gallon for local organic raw milk that needs less processing than the local pasteurized organic milk. Whoops – sidetracked on cheese.
Back to the arugula question. I had ricotta that needed to be used and the big pile of arugula and I had a itching to attempt ravioli. For my birthday this year Gary (ever so sneakily) surprised me with a Kitchen Aid Mixer. An item I had been coveting for several years due to it’s multi-purpose potential, but would never buy for myself. My parents got me the pasta roller and grinder attachments so I have been experimenting with my own sausage, home-ground medium rare burgers (YUM!) and pasta since May. But I had yet to attempt to make ravioli. So I decided on an arugula-ricotta-sun dried tomato filling for my first attempt. The dried tomatoes are left over from last years harvest, we are still waiting for our first ripe tomato this year.
I made a quadruple batch so that I could freeze the majority of the ravioli for the dead of winter when the current overabundance of fresh greens will be a memory.
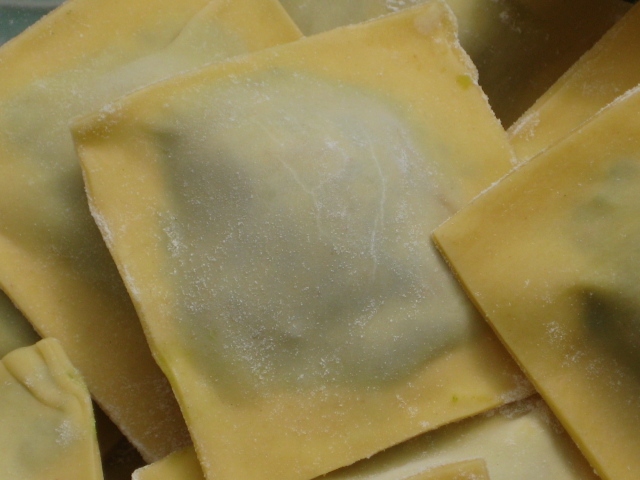
Arugula Ravioli with Sun Dried Tomatoes and Ricotta
For the Pasta Dough
- 4 cups flour
- 4 eggs (from the girls)
- 1 1/2 tsp salt
- Water
Beat Eggs together until the whites are well incorporated with the yolks. In a large bowl combine the flour and salt, then mix in the eggs until a crumbly mixture forms. Sprinkle in water, bit by bit until the dough sticks together when kneaded but is still somewhat dry and leathery feeling. Note that I made the dough a bit wetter than I usually would for cut noodles since I wanted the ravioli noodles to adhere to each other a bit more readily. Form dough into a ball and wrap tightly in plastic wrap. Set aside to rest (30 minutes, give or take) while you make the filling.
For the ravioli filling
- 1 3/4 cup dry ricotta cheese (goat cheese would be tasty too)
- 3/4 cup julienned sun dried tomatoes (rehydrated in oil or water)
- 8-12 ounces washed arugula leaves
- Salt and pepper to taste
Bring a large pot of water to boil, large enough to completely submerge all of your arugula. Quickly blanch the arugula in the boiling water and remove to a colander or salad spinner, either squeezing or spinning out the residual water once cool enough to touch. Finely dice the blanched arugula (I threw it in the food processor for a couple spins). In a medium bowl combine the ricotta cheese, sun dried tomatoes and arugula. Mix thoroughly and season with salt and pepper to taste (go a little heavy on the seasoning side, keeping in mind that the filling will be compensating for somewhat bland noodles). Set filling aside and return to your pasta dough.
Split the pasta dough into 8 equal portions and flatten into rounds with the heel of your hand. Pull out one round at a time, keeping the others wrapped in plastic or a moist towel. Run the dough through your pasta roller on the lowest setting, folding into thirds between each run and feeding the raw end first. Once your dough has a uniform size and elasticity move up to the next setting on the roller and pass the dough through. Continue moving one notch up with each pass until you reach the desired thickness for your ravioli. I brought the pasta to “6” on my roller.
Lay out your sheet of pasta on a lightly floured counter or cutting board. Cut the sheet almost in half, making one of the sides 2-3 inches longer than the base sheet. I find this helps in making sure there is enough of the top sheet to accomidate the filling. Using a teaspoon, drop small mounds of the filling about 2 inches from each other along the shorter pasta sheet.
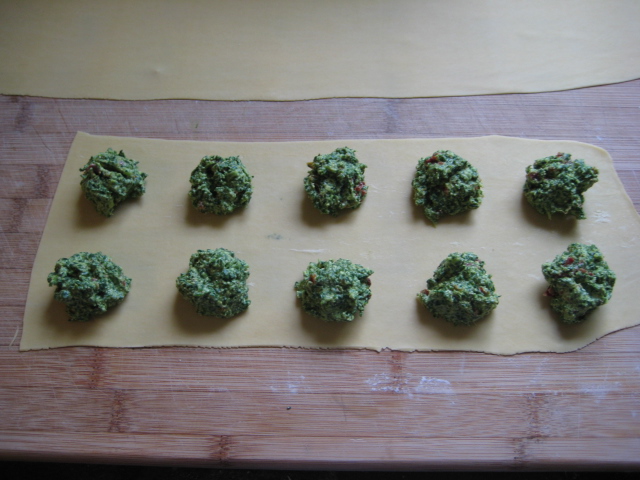
Take a pastry brush (or your finger) dipped in water and run it along the center lines and edges of your ravioli filling. Carefully drape the top sheet over the bottom, starting at one end and using the side of your hand to press the top sheet between the filling before moving on. Once fully laid down, return to the mounds of filling and gently press the top layer of pasta dough to the bottom layer around the filling, making sure you press out any air bubbles before fully sealing each ravioli. Use a big kitchen knife to cut between the ravioli and lay them on a floured baking sheet.
After air-drying a bit you could either cook em up right away, or do as I did and freeze them. I left them on the sheet pan and put them in the freezer for several hours. Once solid I transferred them to a gallon ziplock bag for easier storage and space saving.
Tags: Cooking · Local Food
The bee balm is in bloom and the hummingbirds wasted no time in gathering their dinner. Every year I watch them from the patio. The lilac is always their first source of visible food in our garden. Once the lilac blooms fade they spend several weeks flitting about and dive bombing our heads until the Bee Balm fills in where the lilac left off.

Tags: Gardening · Wildlife
We’ve been in the greens for a while now from the garden. Last night was a late dinner, destined to be leftovers of the stew I made the day before. It was a grand Sunday of stock-making, including duck, shrimp and chicken stocks and I made a simple stew of kale, leftover chicken, carrots, celery and homemade sausage with cornmeal dumplings. But I decided to throw together a salad to go with the stew for a little variation.
I tore up a head of butter lettuce and arugula
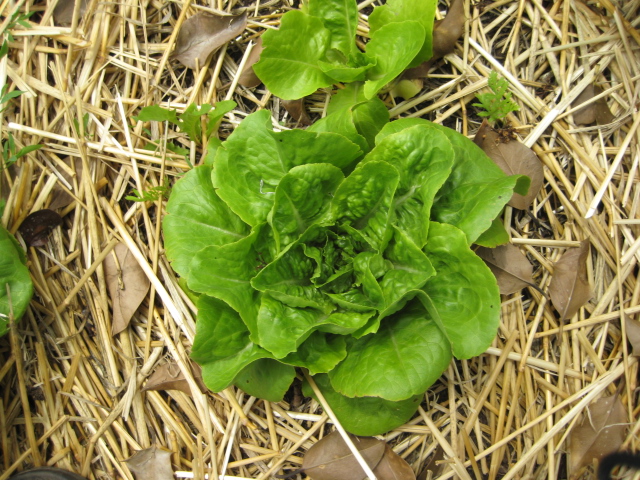
Snipped a few green onions from the Egyptian Walking Onions, cut up some Skyway Sourdough** bread into cubes and sauteed with olive oil, and threw in some snow peas from the garden for good measure. I also poached two eggs from the girls (the Eater got Cleary’s egg since he found it). All the greens were mixed with a simple garlic-mustard vinaigrette and topped with a bit of parmesan, roasted walnuts, the eggs and a multitude of arugula flowers. It was GOOD.
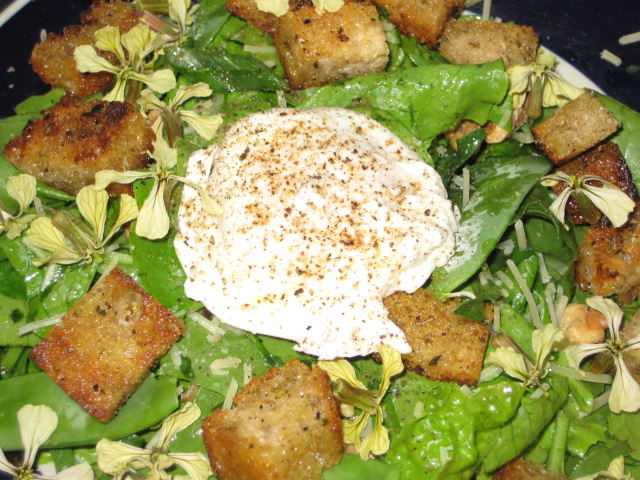
*Non-local Ingredients: Parmesan, Walnuts, Olive Oil. The flour forthe bread came from Montana Wheat, a cooperative that has locations across Montana and Idaho (even Spokane, WA). But we picked it up on our drive back from Montana earlier last month – so I am counting that as local since the mill is attached to thier retail location and we would have driven it either way.
** Skyway Sourdough is my first attempt at making naturally leavened bread, so named for the area I live in. I worked from a starter recipe in a Chez Panisse cookbook. So far so good, I’ve baked several rounds with the starter and it turns out a nice loaf with irregular holes and a slight tang. The dough still spreads a bit too much though, I need to mess with the water/flour ratios a bit more.
Tags: Cooking · Local Food
They hide things from us….
Ever since we got the chickens we have been vexing and worrying over Cleary – the Wyandott because after putting out one egg while housed in my office on the first night, she hasn’t been laying. She throws a fit every time Blume goes in a box to lay, but no eggs from Cleary. So I have been dutifully doing my research, speculating on whether it was a stuck egg (and not enjoying the prospect of having to go spelunking in a chicken oviduct). We are worriers at heart, especially when it comes to our animals which probably in part accounts for the odd $700 in vet bills over the past 4 months, ugh. But all the same, we couldn’t figure out what was wrong with her and she wasn’t showing any other major signs of illness.
And then, just the other day while Gary was weeding back near the base of the coop, he spotted the goldmine. Turns out not just Cleary, but all of the girls have been making secret deposits. He pulled out 11 eggs in total. Just one short of a dozen, which pretty accurately describes our state of mind as well.
Tags: Animals

Finally! After a cold cold spring complete with snow in April, hailstorms and a false start of a couple 90 degree days it seems that the sun has finally decided to grace us with its presence for more than a day, rather than peeking out then running away laughing. The past several days have been beautiful, kicking us into gear to finish the remaining garden beds for this season and scramble to find a home for all the starts that have been languishing in the cold frame.
We harvested an early bumper crop of mixed radishes a few weeks ago and just the other day I realized the snow peas were ready for picking. The arugula bolted within 3 days and I swear the pole and bush beans grew 3 inches. I planted a row of nasturtiums around the rock wall and they are in full cascade toward the ground, bright flowers peering out from behind the spicy foliage.

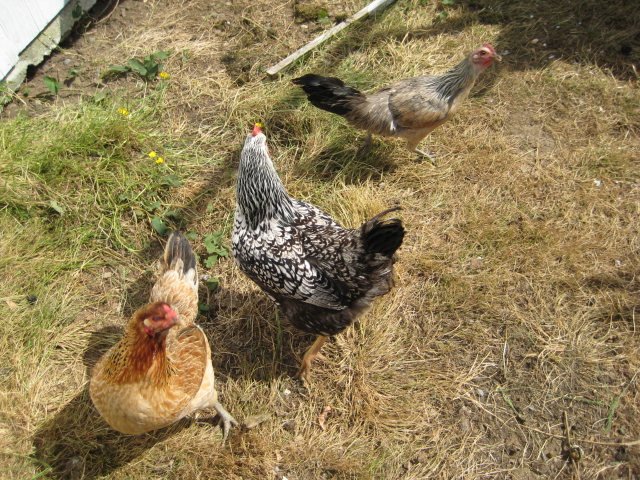
And CHICKENS! Yes, they finally arrived. After several years of talking about it we are now in service to three new residents – Blume, Cleary and Dahl. The new girls are definitely earning their keep too, managing to beat back the morning glory and other weeds that continuously threaten to overtake the compost bin within two days. The long range plan is to use several portable pens to allow them (managed) free range over chosen segments of the garden at different times of the year.
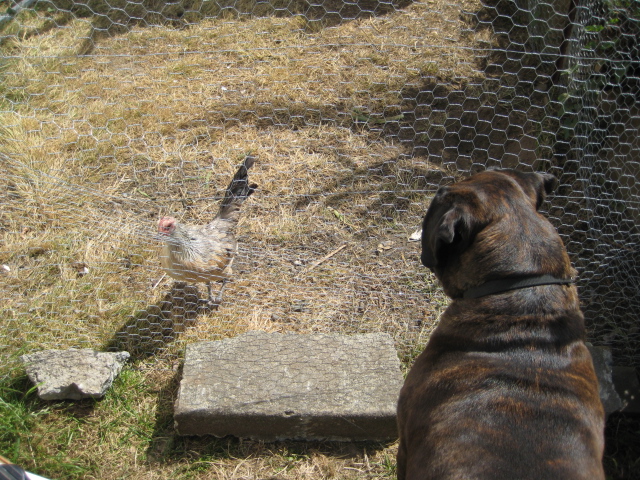
Huxley has acclimated amazingly well to the new arrivals, especially given his hatred of anything with wings. The first day was filled with anxious barking but after that he calmed down and realized that chickens are better than television. He runs up to the pen as soon as we let him out of the house, lays down and watches. He still doesn’t like them being fed when he isn’t getting any of it, and he has a bit of an attitude toward Blume, the banty. He got a bit nosy and stuck his face right up against the chicken wire the first week and she pecked him, twice. Here they are eying each other…
He got into the pen once in the first week while I was on the phone. I came around the corner fully expecting a massacre once I realized what had happened. Instead, I found Hux and the three girls all within a foot of one another, sniffing and scratching at the ground. It sure was cute and makes a great story, but the goal is to avoid that happening again, I don’t think my heart could take it.
Not much cooking in this post, not that it hasn’t been done but there is so much more to talk about. Besides, what happens in the garden eventually ends up at the table – we just need to be patient.
Tags: Animals · Gardening
April 29th, 2008 · 1 Comment
Although I tend to pride myself on trying new things and experimenting, I have had a section of pork belly taunting me from the freezer for the past month and a half. With recent life changes (new job, tons more free time, ahh the luxury!) I decided to give it a go the other night. The most predominant recipes I had seen for pork belly seemed to be consistently Chinese in origin, usually a long-cooked red pork belly or some variation. Since I am on a new austerity program (closely related to the new job and abundant free time) I was not enamoured of trundling out to the local asian market to buy the numerous vinegars, sauces and adornments the recipes called for that I inevitably never have on hand – regardless of how I stock up. Instead I decided to do a simple rub based off of the results of an extended google search of “pork belly”,( I swear I spend more time researching potentials for each meal than I do cooking it).
I crosshatch scored the skin side of the pork belly and massaged a dry rub into the crevices composed of ground fennel and coriander, salt, pepper and a touch of cinnamon. Wrapped the whole thing in plastic wrap and let it sit overnight in the fridge.
A few hours before dinnertime the next day I realized that I had also taken out a bag of whole, frozen squid earlier in the week that had fully defrosted and needed to be cooked before it exiled both the humans and animals from our home. If you have ever let squid sit for more than a day after it has defrosted, you know exactly what I am talking about. It happened to me once – and once is all it takes.
I nudged about in the fridge searching for ideas and found a half cup of cooked beluga lentils leftover from a Delicata, Saffron and Lentil Risotto the night before. Right then – Squid salad with beluga lentils to accompany the pork. I pulled the pork belly out of the fridge and set it skin side up in a roasting pan, turned the oven up to 470 and put it in until the skin crisped. I then turned down the heat to 350, added about a cup of water to the roasting pan and set the timer for two hours, occasionally checking and adding water as necessary.
While the pork belly braised, I cleaned the squid and sliced the tubes into 1/4 inch rings. I cut the eyes from the tentacles and removed the beaks and tossed em all into a steamer for about 3 minutes. Once the squid rings and tentacles had firmed up and turned an opaque white I dumped the contents of the steamer out into a ice water bath to stop the cooking. As the squid cooled I made a quick dressing, pounding a couple of garlic cloves in a mortar along with some cumin. I added salt, olive oil and a bit of lime juice too. I drained the squid and dryed it off – then combined it with the cooked lentils and about 1/8 of a red onion, finely sliced. I poured the dressing on top, gave it a quick stir and put it in the fridge.
I had briefly toyed with the idea of adding some quick sauteed shitake mushrooms to the squid salad but then thought better of it (although I am still not convinced it would have been a bad thing). Instead I sauteed the sliced shitakes alone in a pan with butter and olive oil.
I had expected the pork belly to be outrageously fatty, given that this is the same cut our beloved bacon comes from. But the long braise in the oven had sucessfully rendered the grand majority of the fat from the meat and left it incredibly tender with a crunchy skin crust to rival any expertly roasted chicken. The earthiness of the lentils and cumin in the squid salad married perfectly with the savoury shitakes and pork. The Eater ate every remaining bit of the leftovers and in a very serious tone told me I should write this one down. So – here it is. Unfortunately no pictures were taken in the making of this meal, and the product was consumed so quickly that even an afterthought snapshot was out of the question. So I suppose this entry is less for posterity (and a non-existent readership) than it is for my own reference.
Tags: Cooking
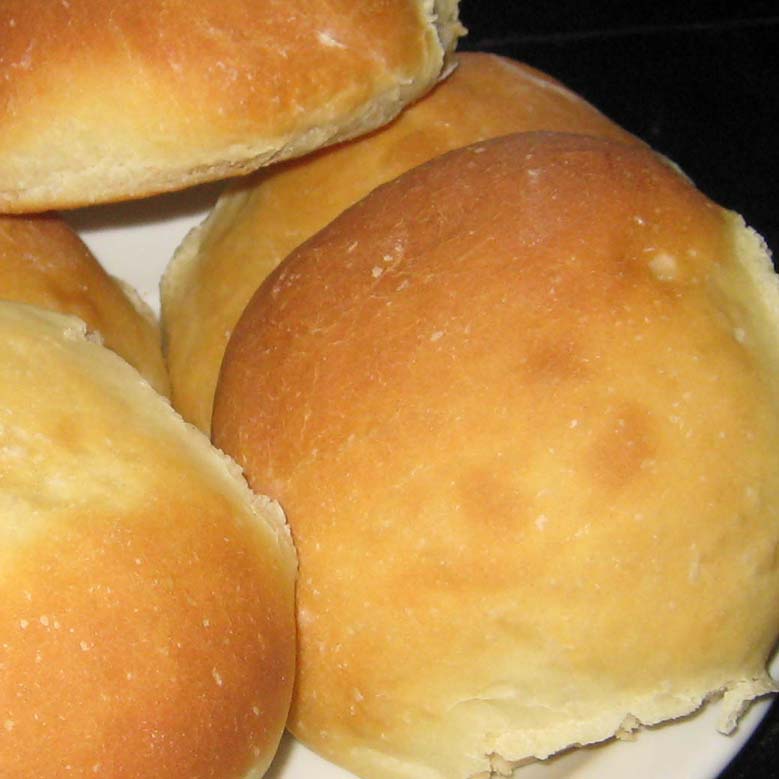
So, long after setting this up and dreaming about daily posts I am finally getting around to actually doing it. The threat of rain and saturated soil has kept me from the garden this weekend so I’m cooking (or baking, as the case may be). We exhausted our supply of bread within the past couple of weeks so I am focusing today on getting the stores stored-up once again. On the menu – Pesto Rolls (recipe courtesy of KitchenMage over at A Year In Bread) and Buttermilk Rolls.
Both of these breads freeze beautifully and I have made a habit of always making a double batch to keep in the freezer. The buttermilk rolls are a variation of a recipe found on the back of a bag of Bob’s Red Mill dried buttermilk powder. I tweak the ingredients a bit and form some of the dough into loaves instead of doing all rolls. The rolls, if you make them on the larger side, make excellent hamburger buns, or my favorite Lamburger. They are also good drizzled with honey as the Eater tends to do.
The pesto rolls I started making when KitchenMage first posted the recipe and have had multiple sucessfull incarnations. Over this past winter we had an abundance of dried tomatoes from the previous year’s garden. Instead of standard basil pesto, I rehydrated a bunch of dried tomatoes, roasted several heads of garlic and grabbed a huge handful of rosemary from the garden. All of this went into the food processor with a liberal splash of olive oil, salt and pepper. Voila! Sundried tomato pinwheels.
I suppose it is a bit silly to start this blog off with recipes from other sources than my own. But my motivation in undertaking this in the first place is borne out of all of the wonderful recipes and ideas I have come across from other cooks in thier blogs. And I don’t suppose there is any harm in extending thier reach to the poor soul that manages to stumble across this little effort.
Buttermilk Rolls (Variation of Bob’s Red Mill Recipe)
- 2 Tbsp. Active Dry Yeast
- 1 Tbsp. Sugar
- 2 Cups Warm Water
- 5 Cups White Flour (I use Fairhaven Flour Mill brand, a local organic co-op in Bellingham)
- 4 Tbsp Buttermilk Powder
- 1 Tbsp Sea Salt
- 3 Tbsp Olive Oil (The original recipe called for melted butter)
Combine yeast, sugar and water to proof. Add 2 cups of flour to the liquid and mix, then add salt, buttermilk powder and olive oil. Continue mixing while adding in remaining flour, turning out to knead when mixing becomes too hard. Knead dough until smooth. Place in an oiled bowl and allow to rise to double its original size.
Punch down dough and divide into rolls or loaves. One recipe will make two standard loaf pans or 24 small rolls. Form loaves/rolls and let rise a second time in pan. Preheat oven to 375. When dough has had its second rise bake in oven for 15-20 minutes until golden and hollow sounding when tapped.
Tags: Baking


